Estimate
Build costs in Pricing, render an estimate, review and send a client-ready quote.
Purpose
In Aginera, estimates are tied to your pricing schedule (source of truth for costs). You finalize numbers in Pricing, use Render Estimate to create or refresh an estimate document, then open the Estimates tab to review, run AI Check, Preview, and Send to the customer.
Who this is for
- Estimators / QS: publishing quotes from priced line items.
- Admins: keeping pricing schedules and estimate outputs aligned.
Prerequisites
- Documents uploaded. See Document upload.
- Components / extractions and a pricing schedule in good shape where your workflow requires it. See Pricing schedule.
Steps
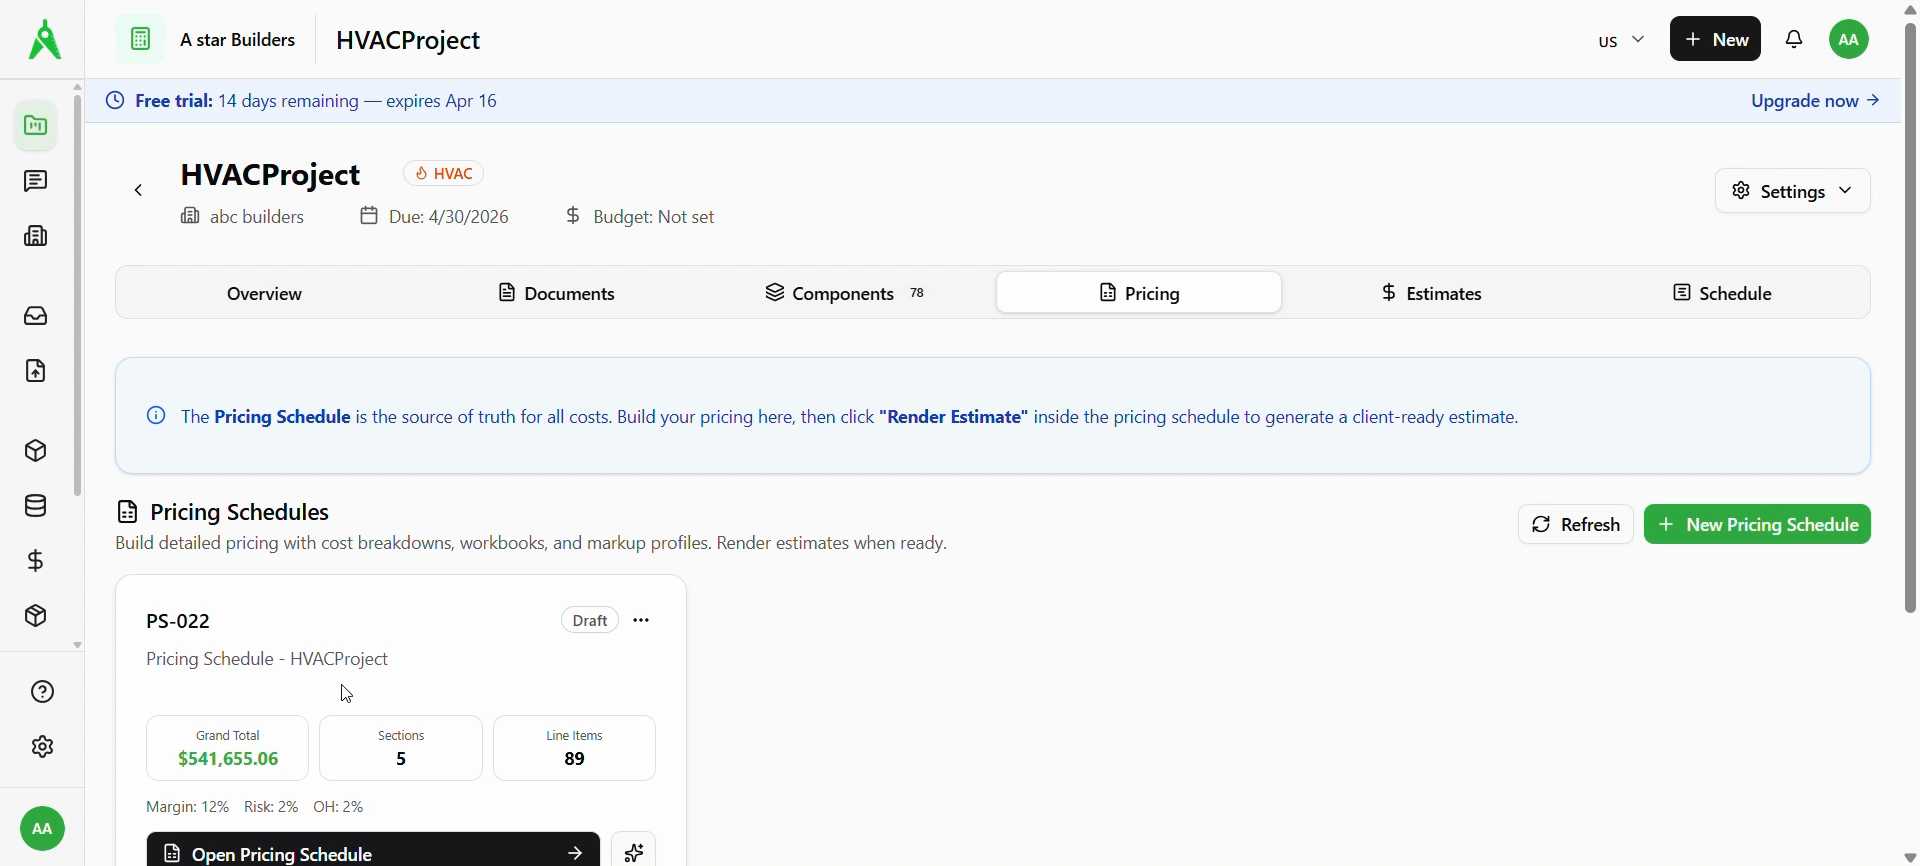
1. Start from Pricing (source of truth)
Open the project Pricing tab. The banner explains that the pricing schedule drives costs and that you Render Estimate from inside the schedule to produce a client-ready estimate.
Open your schedule (for example PS-022) when totals and line items are ready.
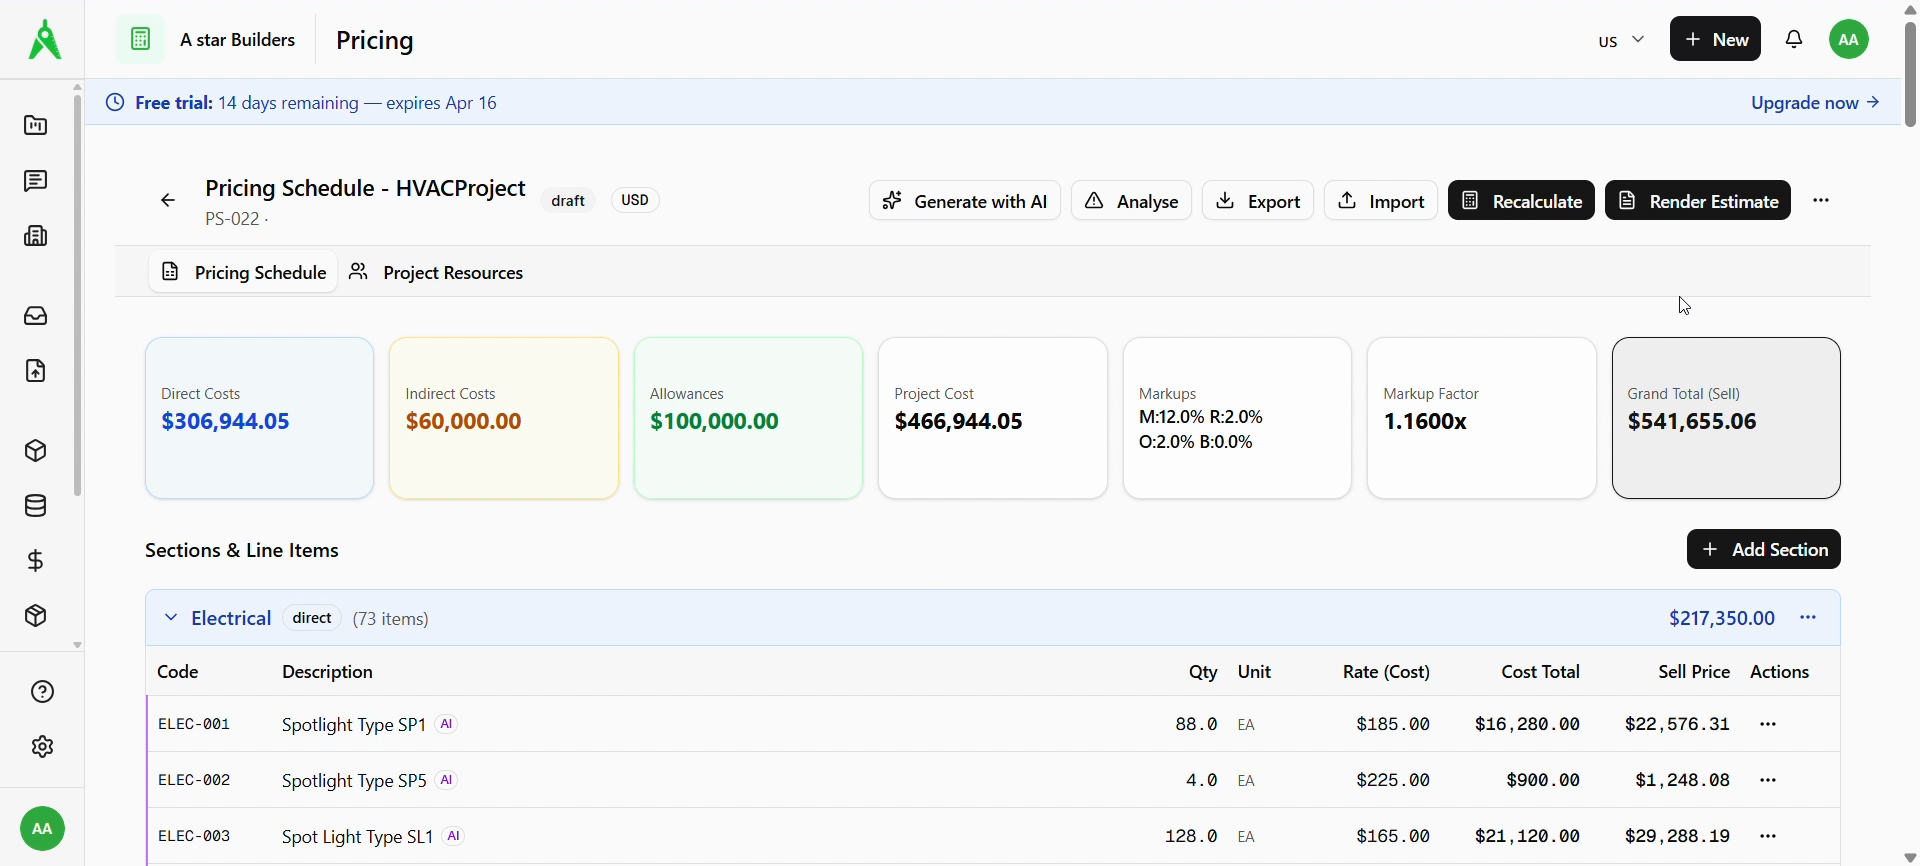
2. Render estimate from the pricing schedule
Inside Pricing Schedule, review Sections & Line Items, summary cards (direct/indirect costs, markups, grand total), then use Render Estimate. While rendering, the action may show a processing state (for example Rendering…).
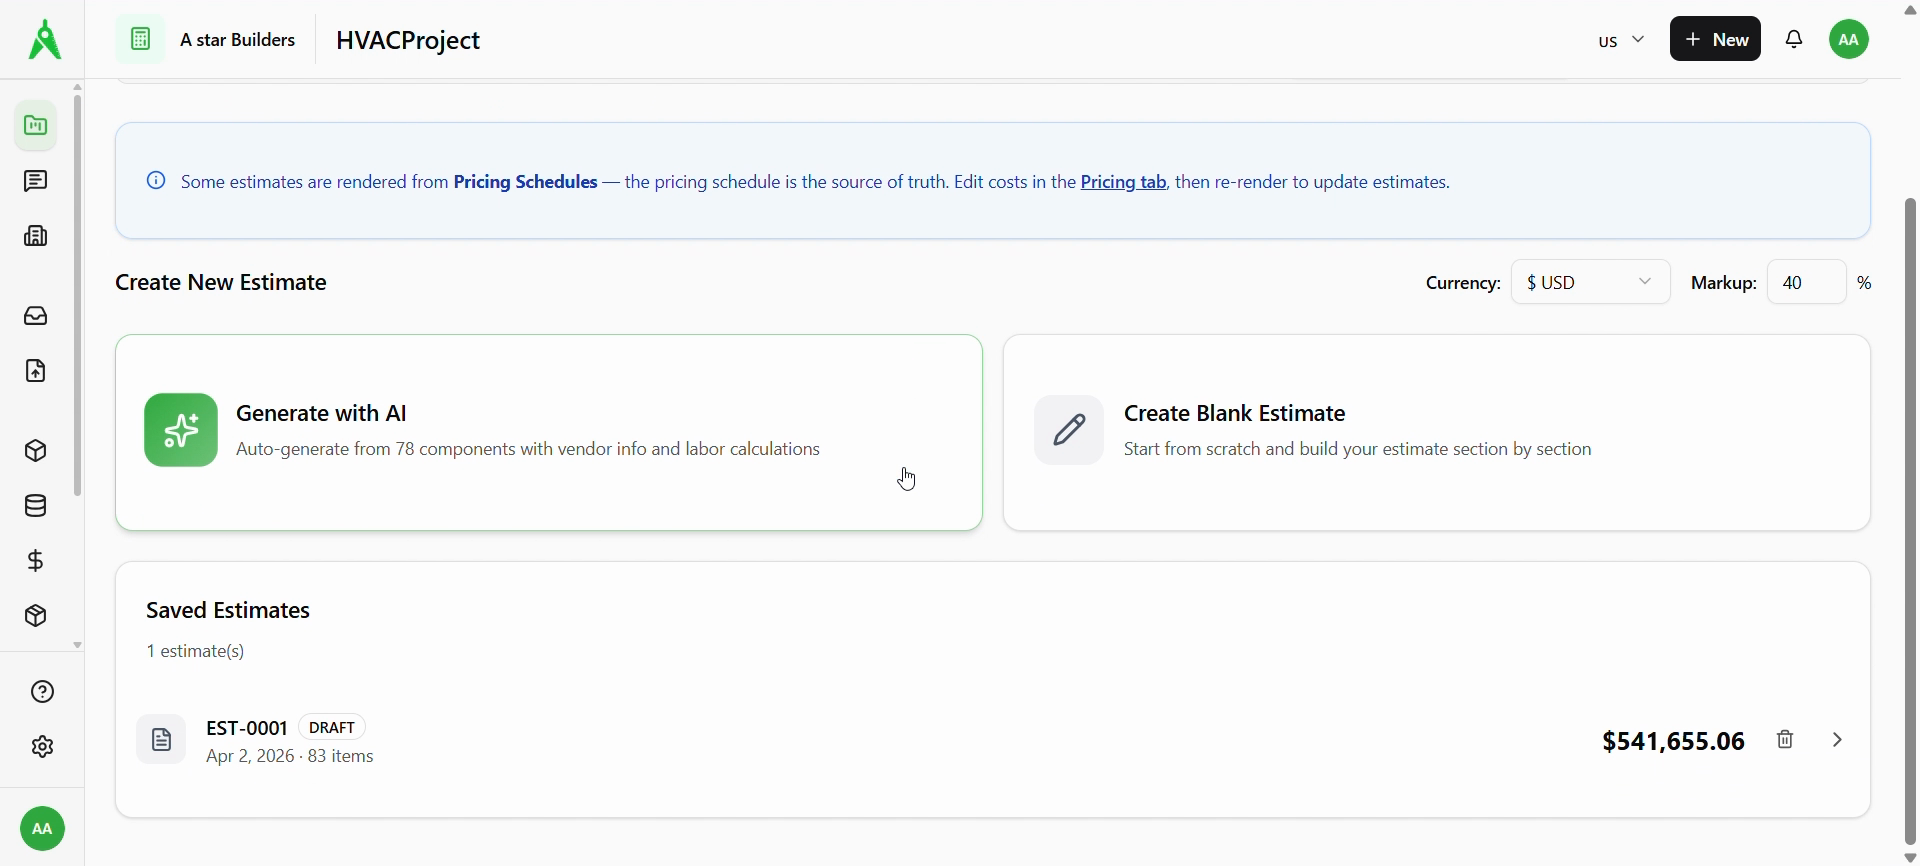
3. Open the Estimates tab
Go to Estimates. The banner reminds you that many estimates come from pricing schedules: edit costs under Pricing, then re-render to refresh.
Create a new estimate with Generate with AI (pulls from project components where configured) or Create Blank Estimate. Set Currency and Markup as needed for new drafts.
Your Saved Estimates list shows ID (e.g. EST-0001), status, date, item count, and total.
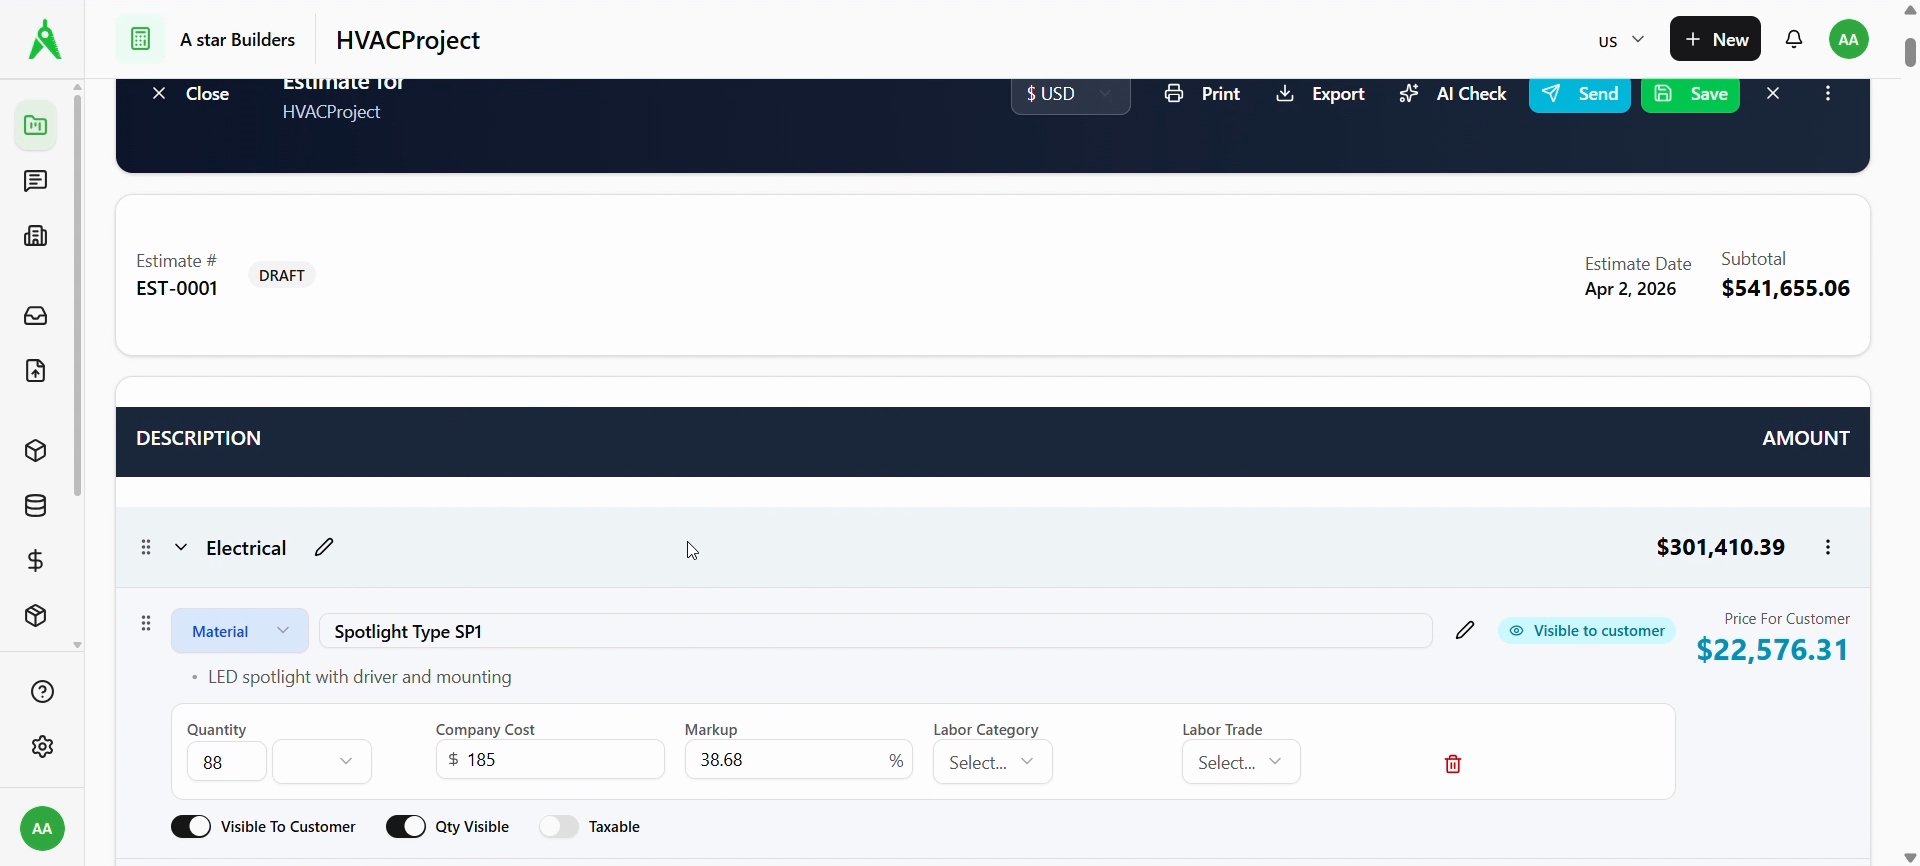
4. Edit the estimate document
Open an estimate to see Estimate #, status (e.g. DRAFT), date, and Subtotal. Line items are grouped by sections (e.g. Electrical) with customer pricing, quantity, cost, markup, and visibility toggles (Visible to customer, Qty Visible, Taxable).
Use Print, Export, AI Check, Send, and Save from the header. The ⋯ menu may include Preview, Duplicate, export integrations, or Delete.
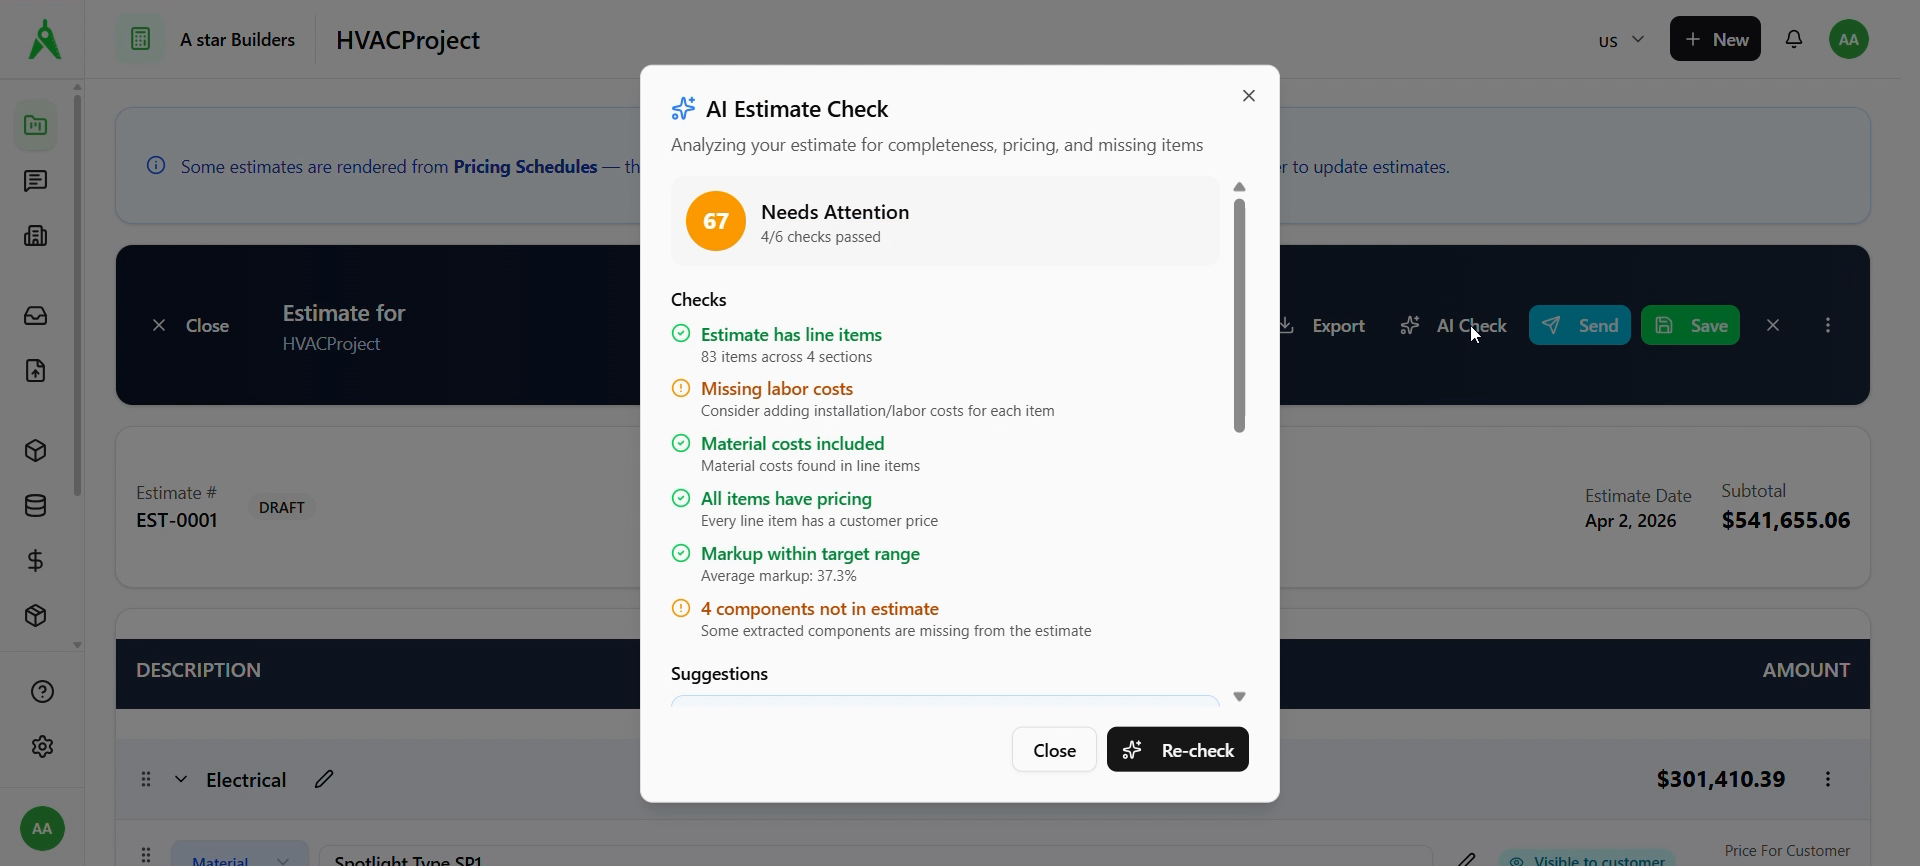
5. Run AI Estimate Check (optional)
Choose AI Check to open an audit of completeness and pricing (score, passed/warning checks, suggestions). Use Re-check after you fix issues.
6. Preview and send
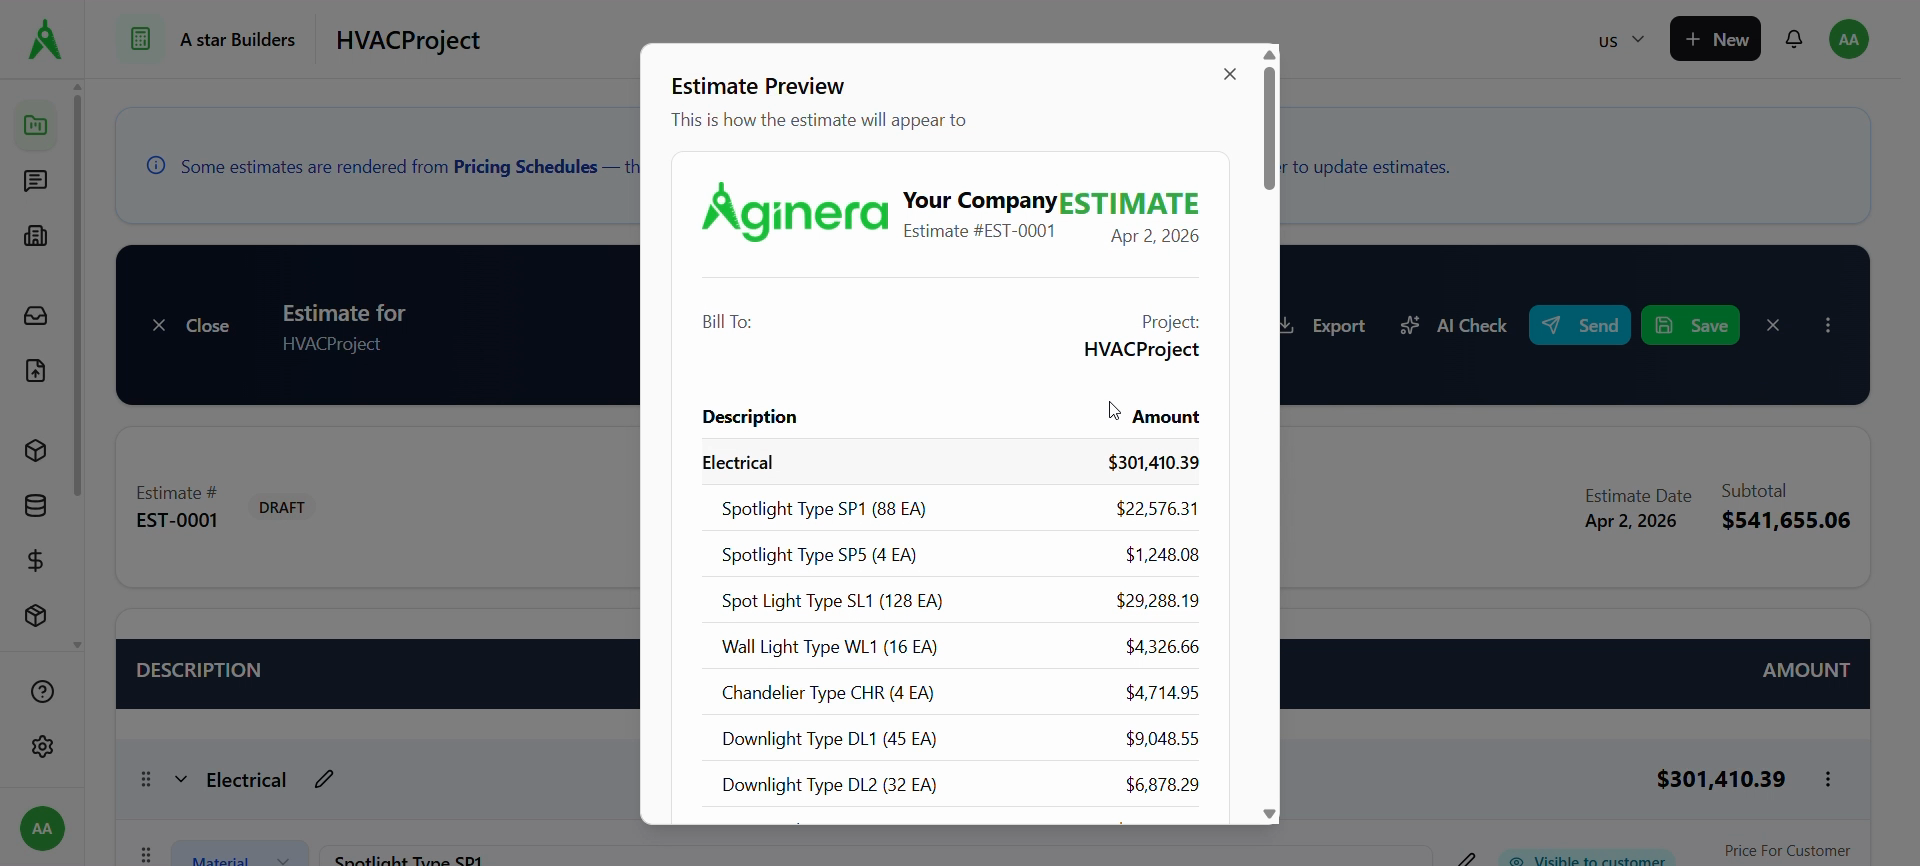
- Preview (from the menu where available) opens an Estimate Preview of the customer-facing layout.
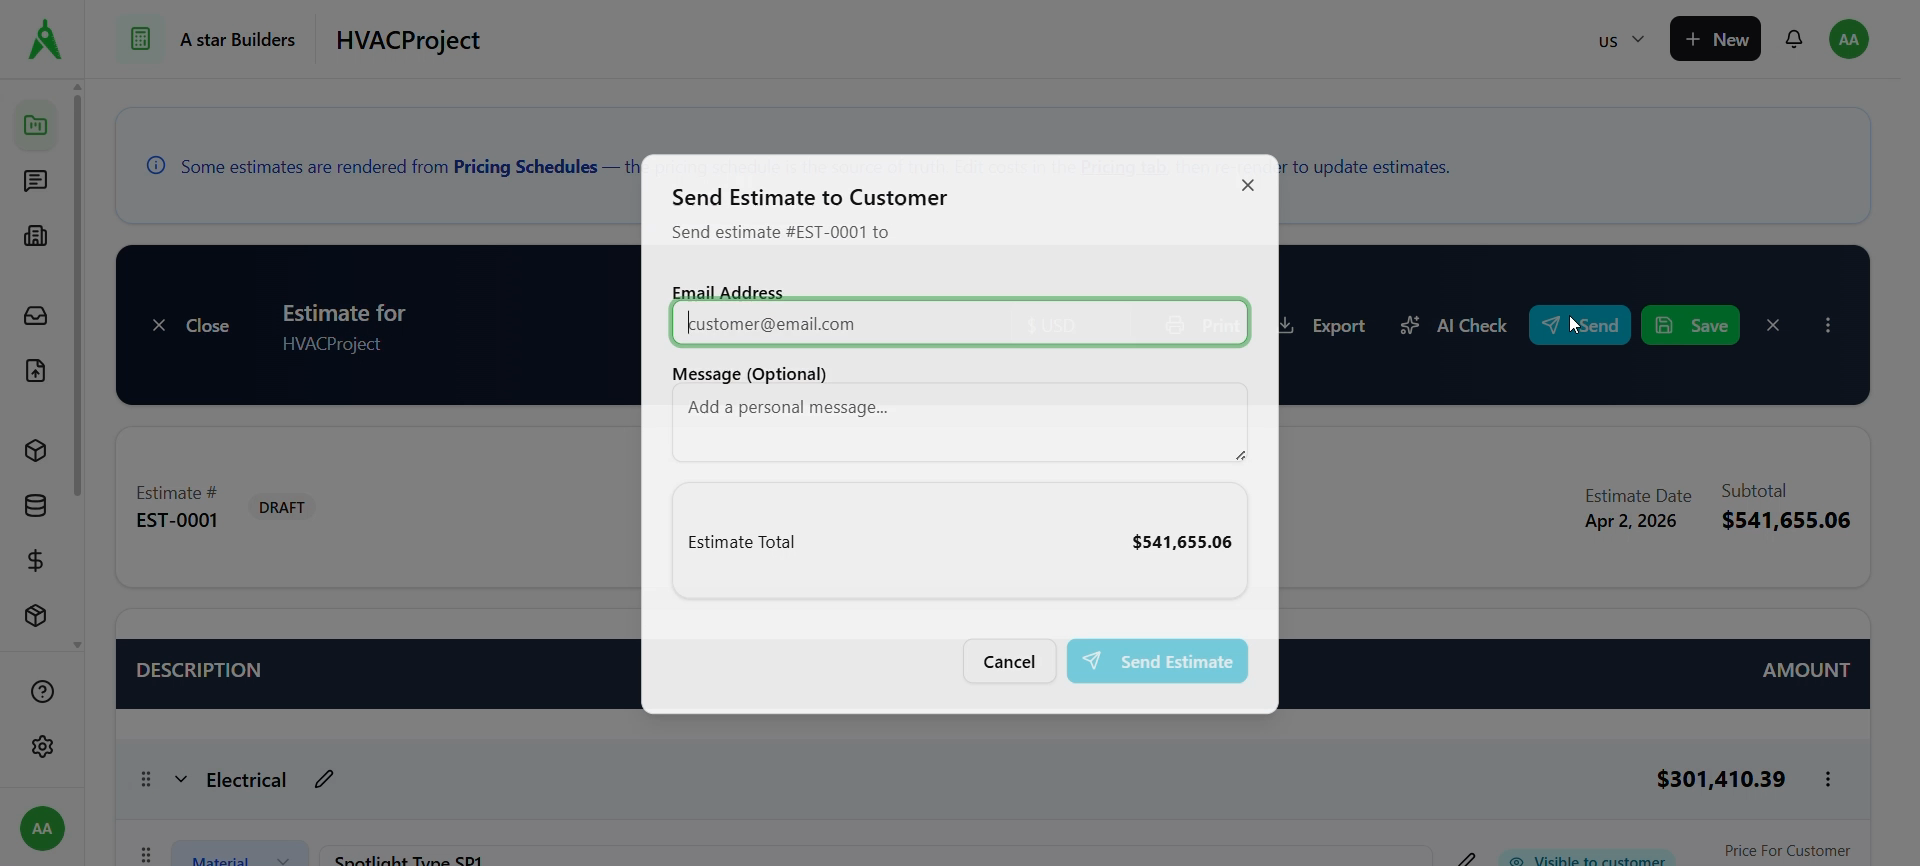
- Send opens Send Estimate to Customer: enter email, optional message, confirm the total, then send.
Expected result
- Estimate totals match your pricing schedule after render.
- Draft is reviewed, checked, and sent or exported as your process requires.
Troubleshooting
- Totals out of date: change costs in Pricing on the schedule, Recalculate, then Render Estimate again.
- AI Check warnings: address missing labor, components not in the estimate, or markup issues called out in the modal.
- Send disabled or blocked: save the estimate, resolve validation errors, and confirm customer email.
Related
- Previous: Pricing schedule
- Next: Schedule
- Guides: Takeoff / Estimate