Schedule
Project Schedule — generate tasks from your estimate with AI, group phases, edit tasks, and track progress.
Purpose
The Schedule tab shows your project’s tasks in groups (phases), with assignees, dates, duration, and status. You can generate a schedule from your estimate with AI, add groups and tasks, edit tasks in a dialog, and save the plan. Progress is summarized at the top (task counts and completion %).
Who this is for
- Estimators / QS: turning estimate scope into a workable timeline.
- PMs / leads: assigning work and tracking status.
- Admins: ensuring the right people can edit the project schedule.
Prerequisites
- A project exists and you can open it.
- For AI generation, an estimate (or equivalent scope) is available so the app can propose phases and tasks.
Steps
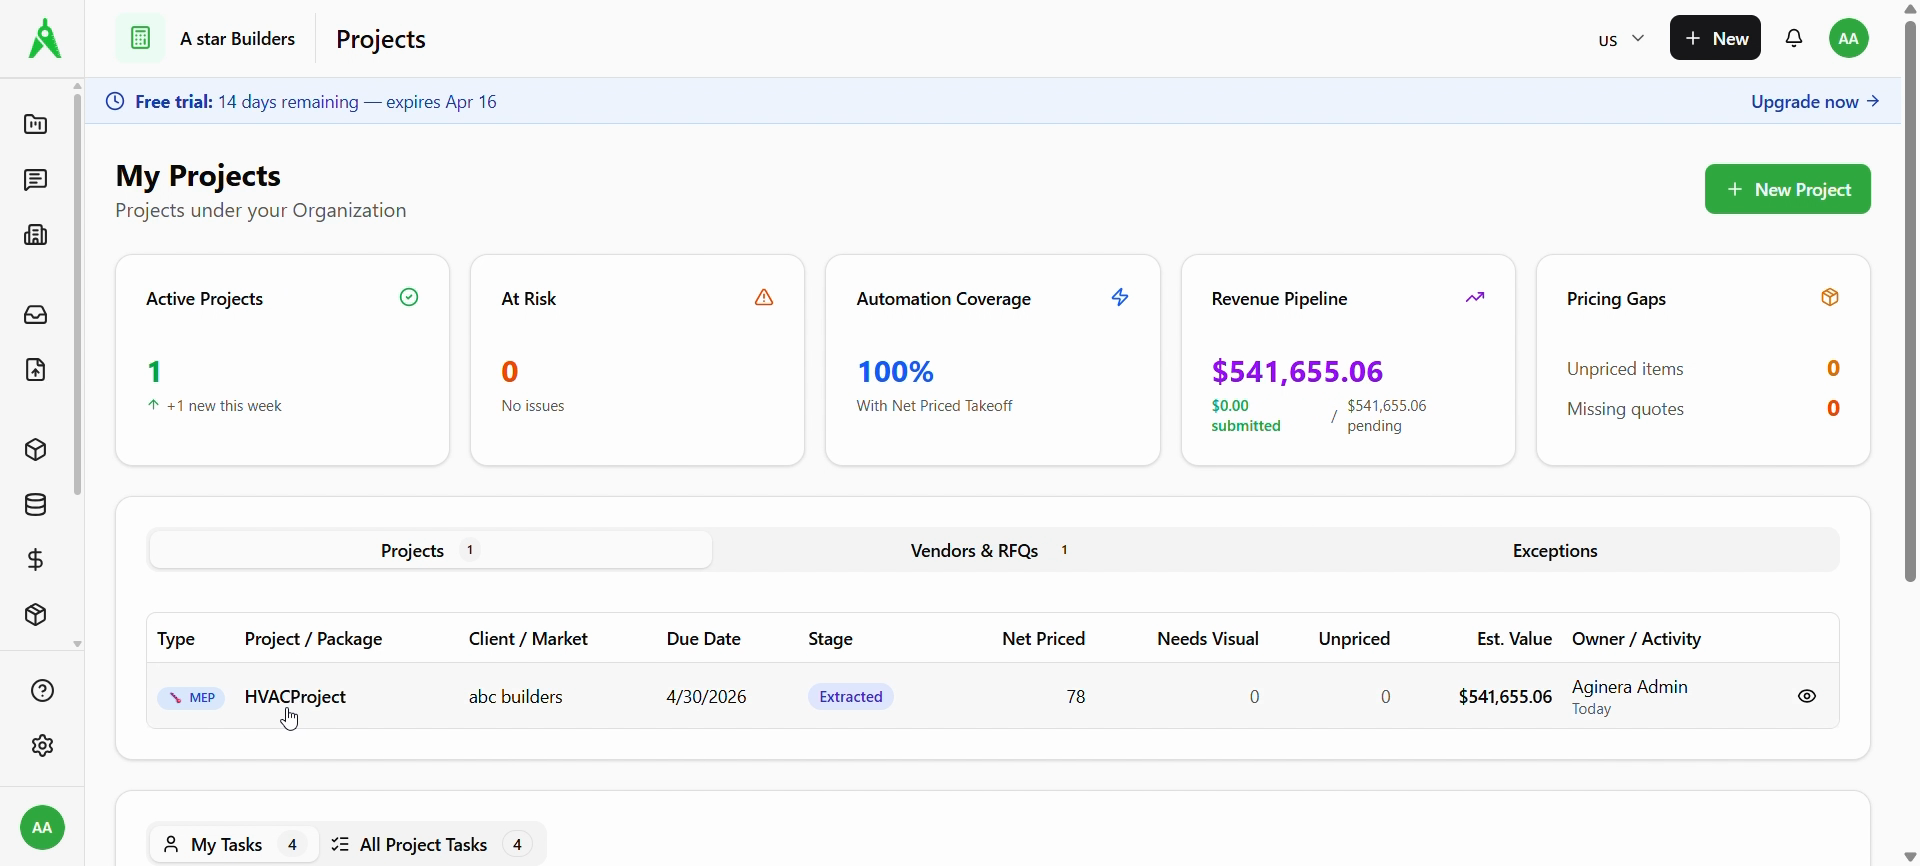
1. Open the project
From Projects, open the project you want (e.g. click the project name). Use the project header tabs to move between Overview, Documents, Components, Pricing, Estimates, and Schedule.
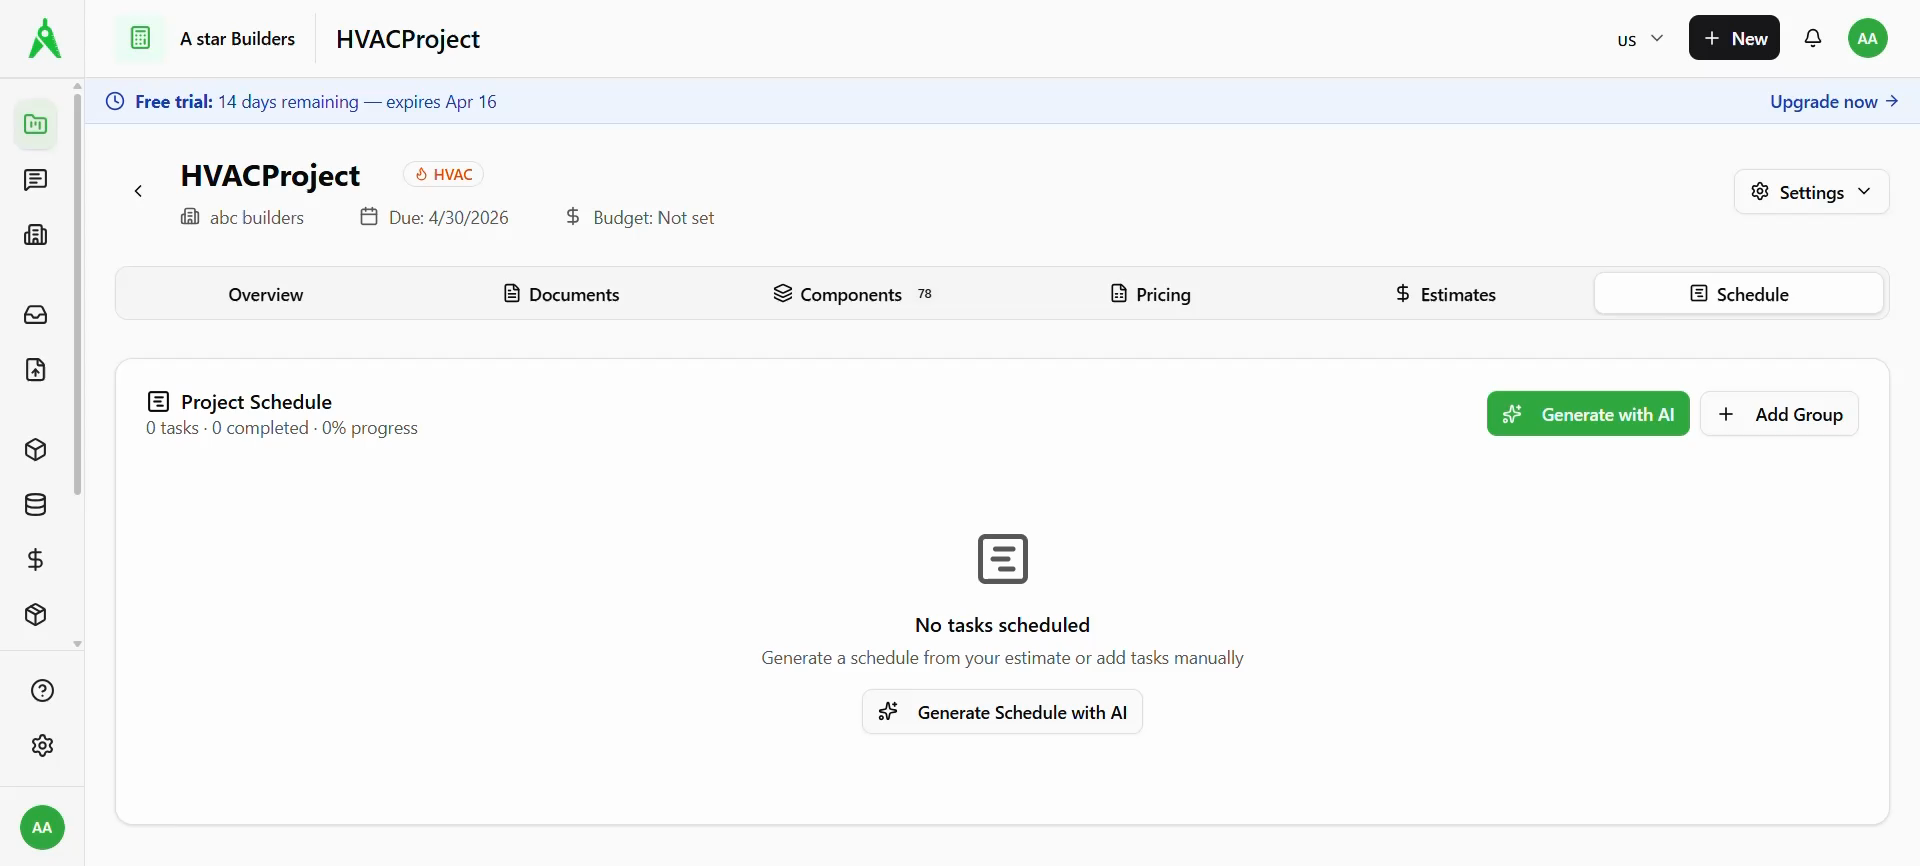
2. Go to Schedule
Select the Schedule tab. If nothing is built yet, you see an empty state: No tasks scheduled, with Generate Schedule with AI (or Generate with AI in the toolbar) and + Add Group to build the plan manually.
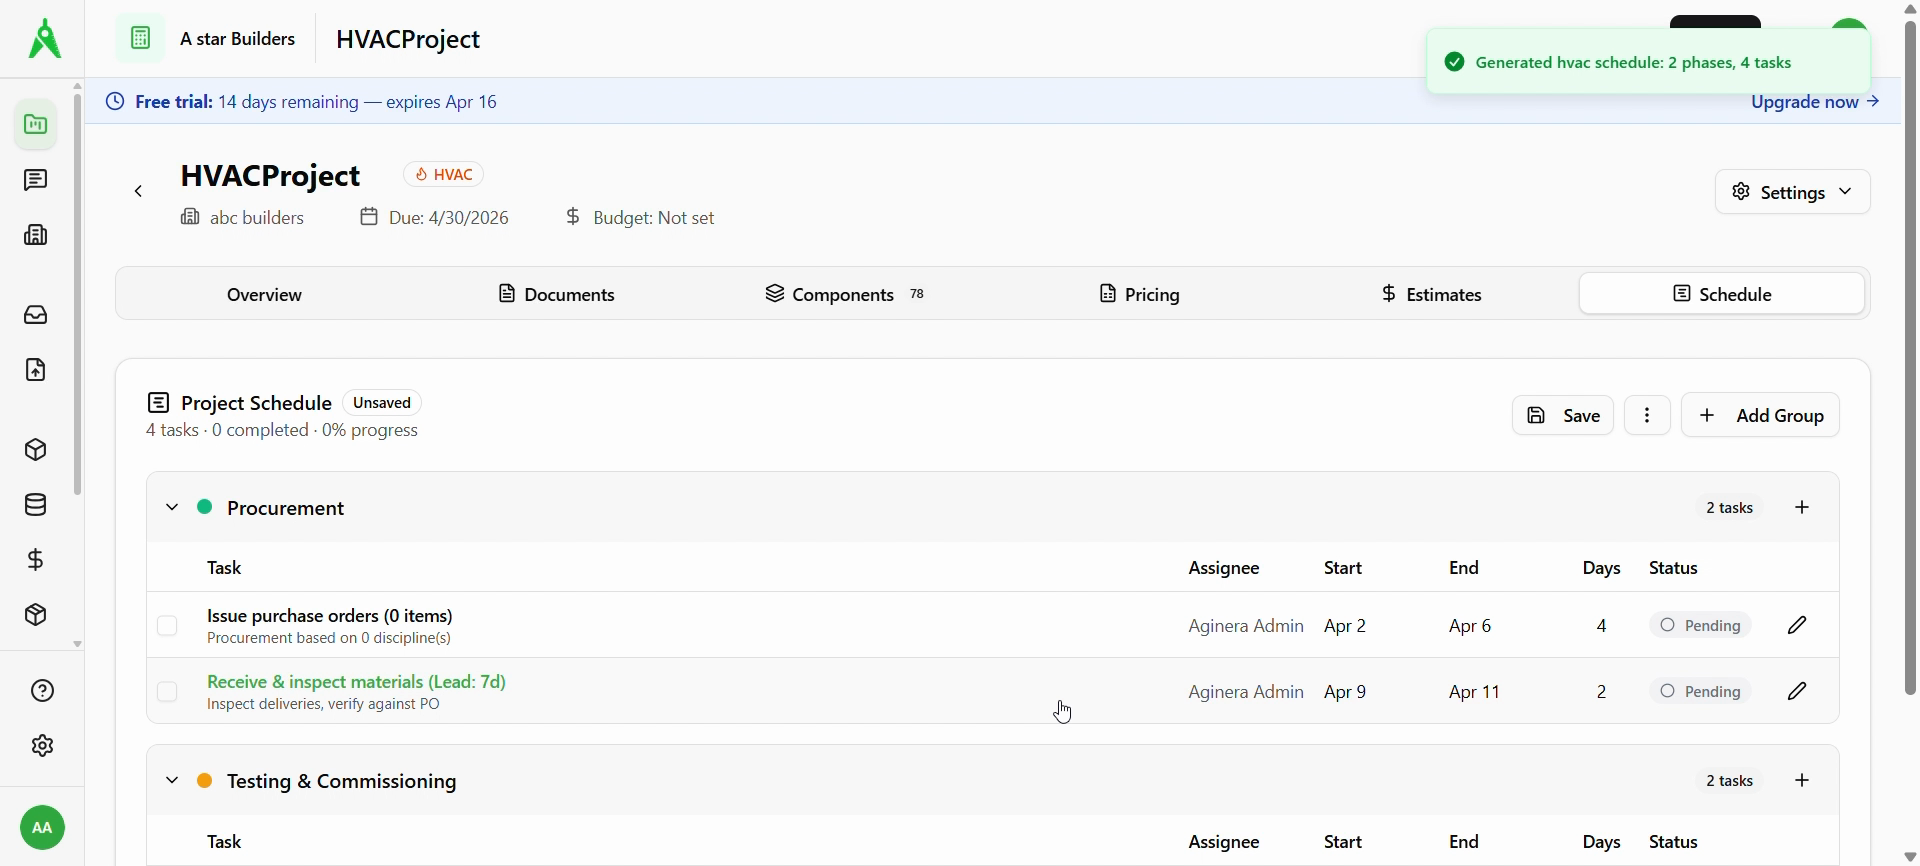
3. Generate with AI (optional)
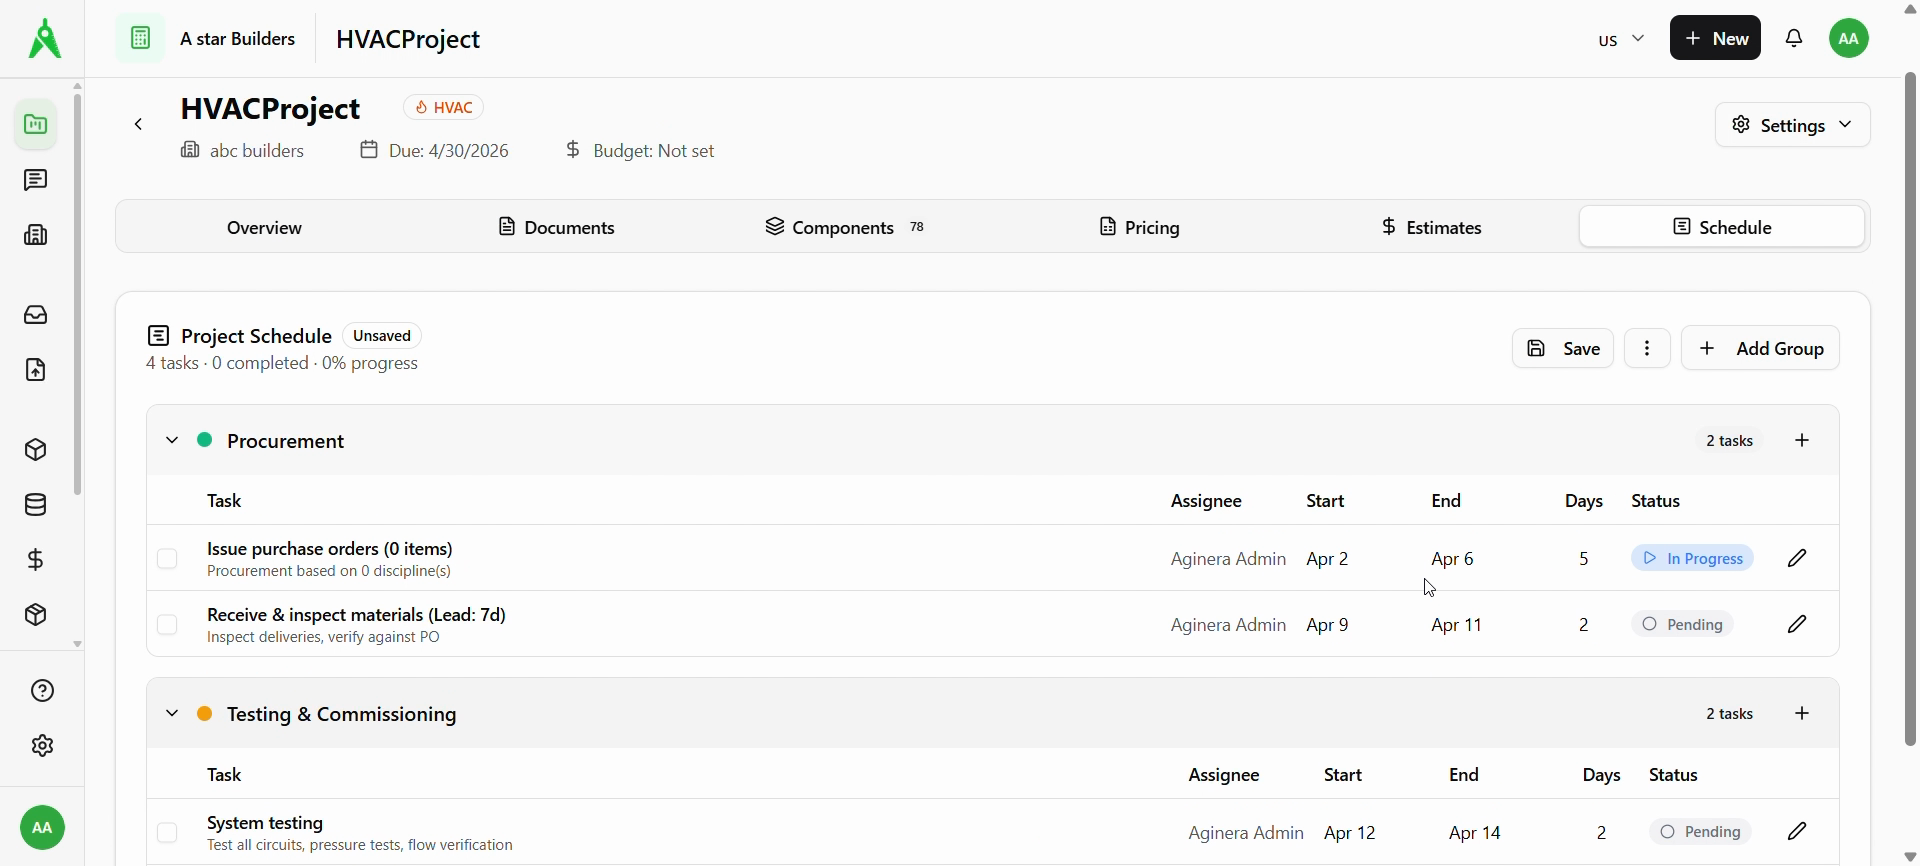
Choose Generate Schedule with AI / Generate with AI. When generation finishes, a confirmation may appear (e.g. phases and task count). The Project Schedule shows groups such as Procurement and Testing & Commissioning, each with tasks, dates, and Pending (or other) status. The schedule may show Unsaved until you save.
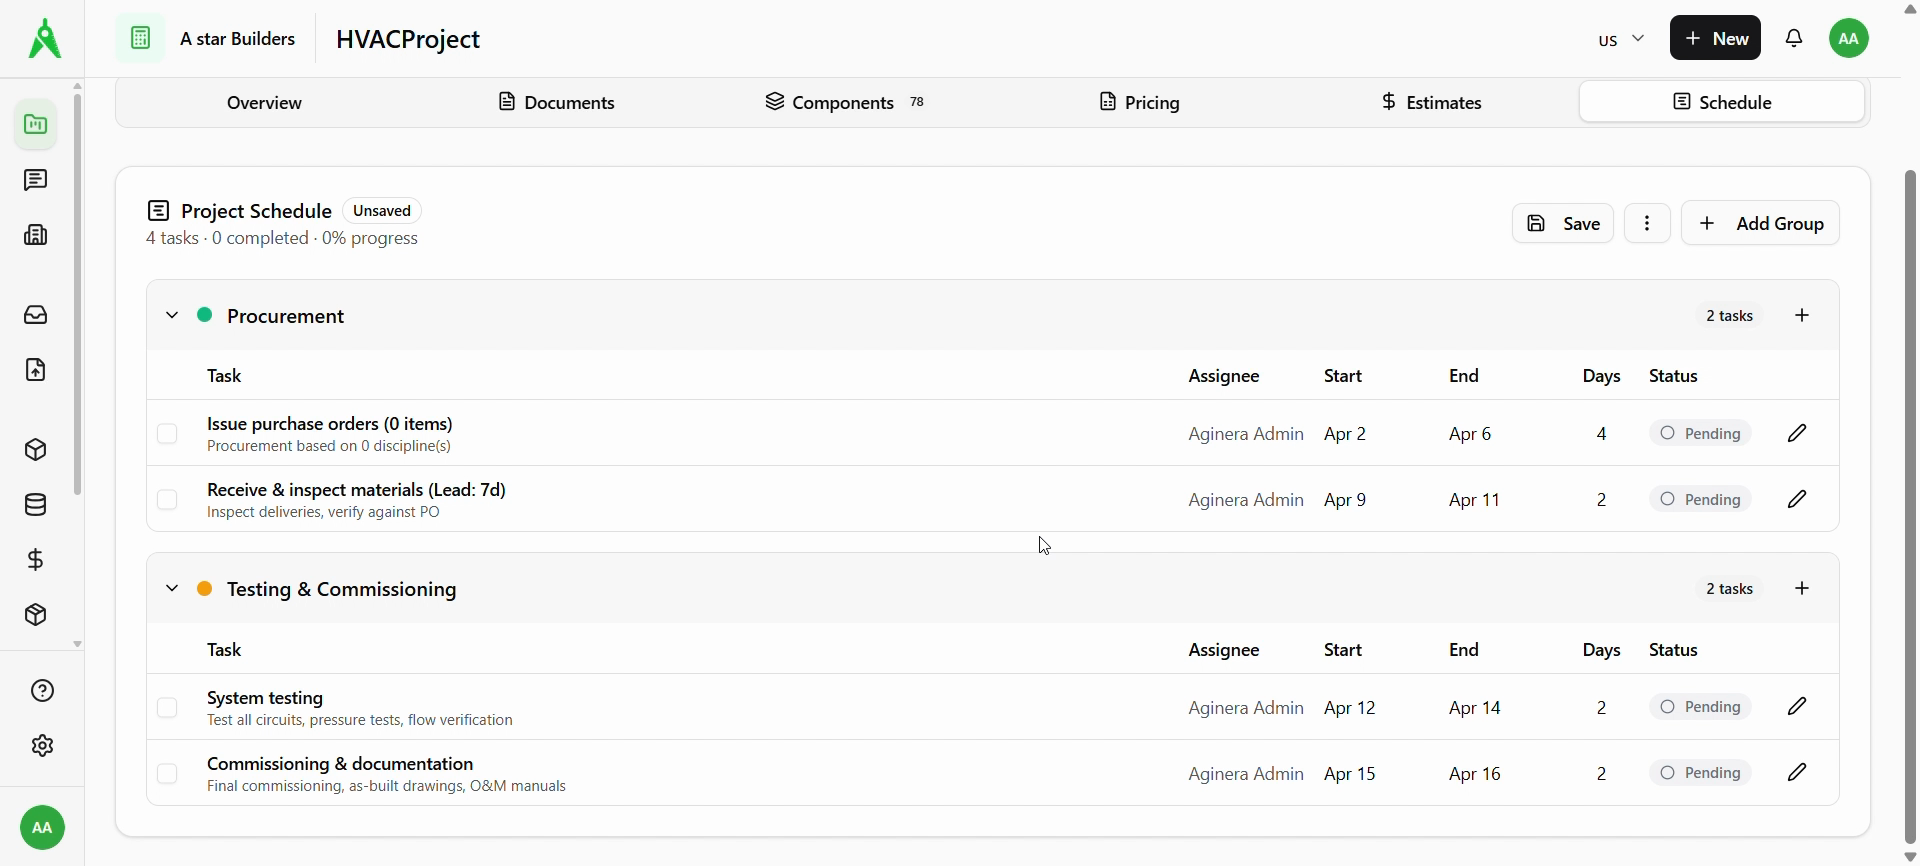
4. Review groups and tasks
Expand each group to see rows with task title, description, assignee, start/end, days, status, and actions (edit pencil). Use + Add Group or + on a group to add structure or tasks. The header shows Save, a more (⋮) menu, and summary stats (e.g. tasks completed, % progress).
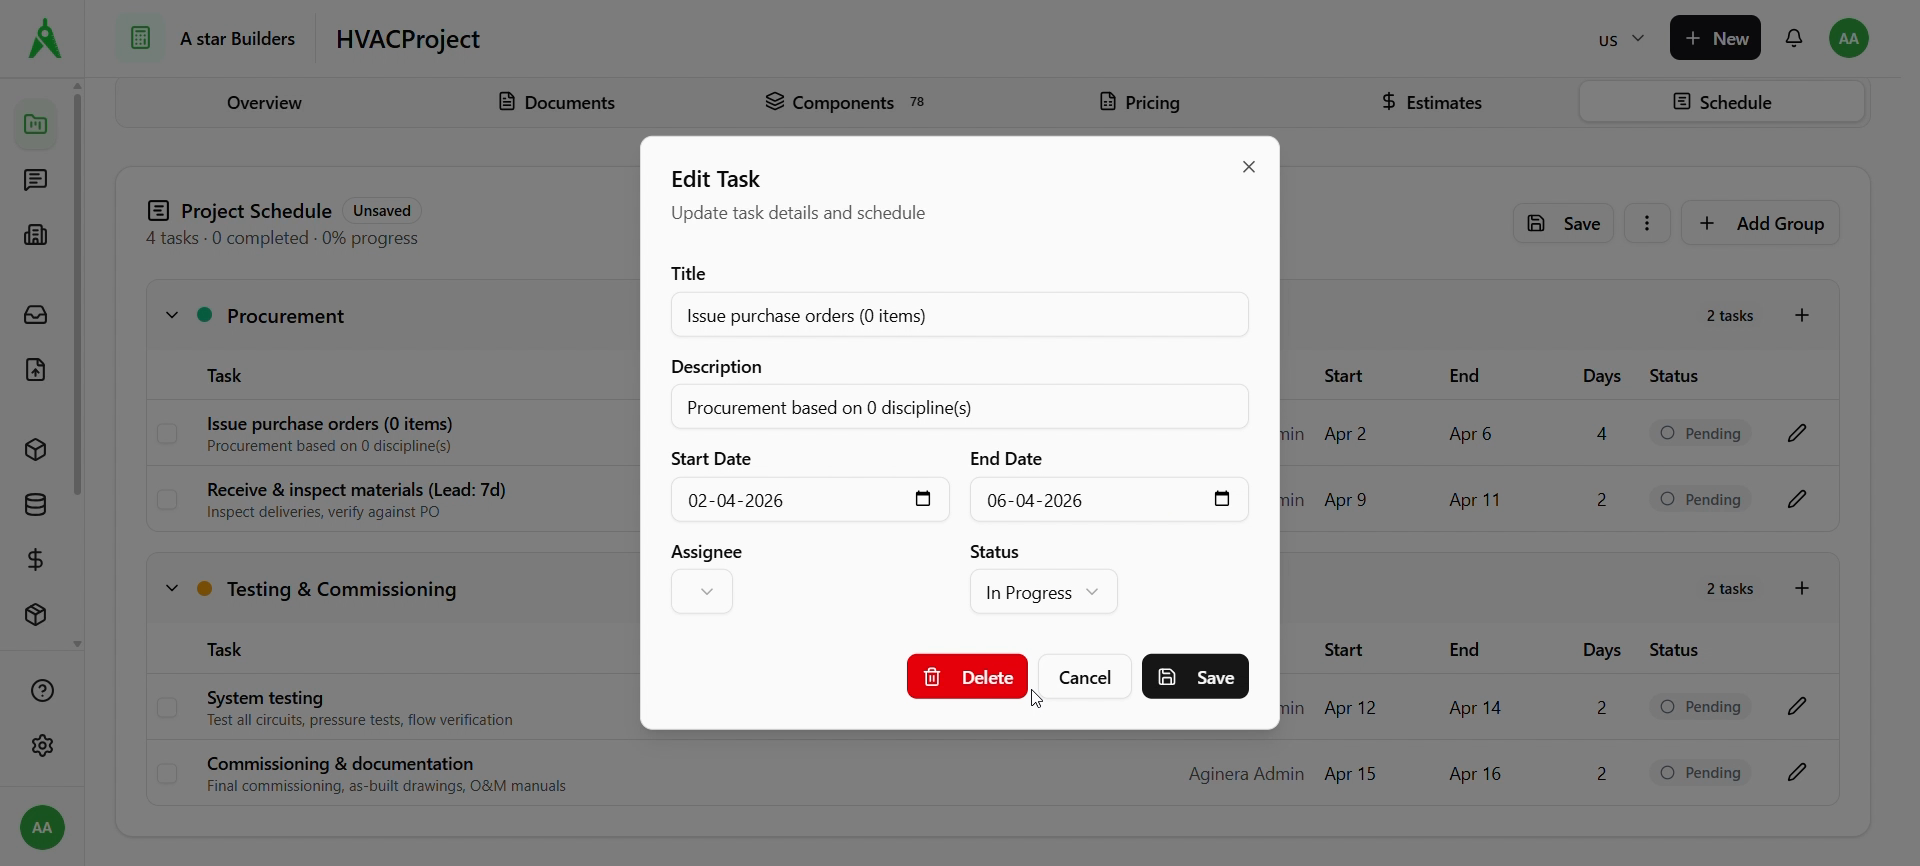
5. Edit a task
Click the pencil on a row to open Edit Task. Update title, description, start/end dates, assignee, and status (e.g. Pending, In Progress). Use Save in the dialog to apply, Cancel to discard, or Delete to remove the task.
6. Save the schedule
After changes, click Save on the Project Schedule bar so updates persist. Status badges (e.g. In Progress, Pending) reflect each row.
Expected result
- Tasks are grouped by phase, dated, assigned, and status-tracked.
- The schedule stays in sync with your saved changes and shows overall progress in the summary.
Troubleshooting
- Schedule is empty: confirm you’re on the correct project; run Generate with AI if you have estimate data, or add groups/tasks manually.
- Unsaved changes: click Save before leaving; refresh only after saving if prompted.
- Can’t access Schedule: check project permissions with your admin.